Selecting the right project management tool for you and your team can be a hassle, especially when you need multiple seats, but don’t have the budget. If you’re not ready to invest yet, or you’re still on the hunt, you can build a functional project management board in Google Sheets in the meantime. Keep reading to learn how.
Mapping Out Your Project Board in Google Sheets
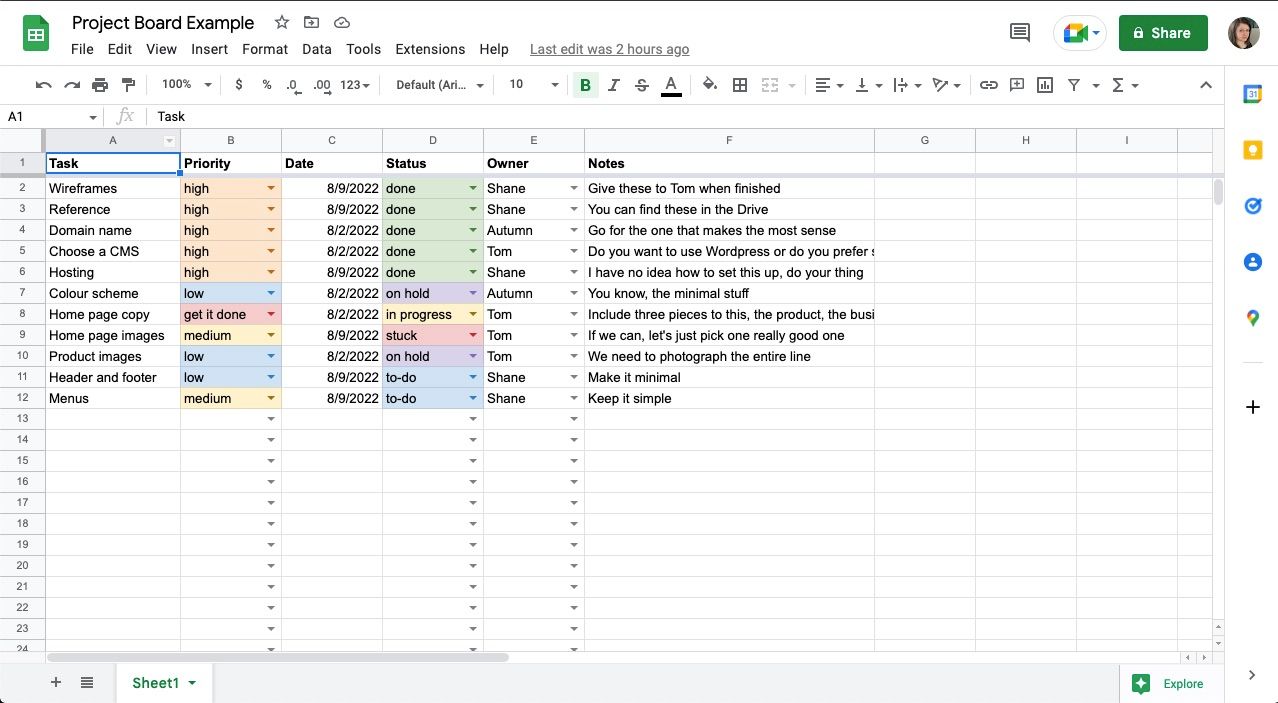
First things first, you’ll need to determine which columns you’ll use in your board. To do so, make a list of the basic information you’ll need to relay, like the Task Name, Due Date, Priority, Status, and Notes.
An owner column will indicate who’s working on the task if you’re collaborating with others. If multiple people are delegating within the board, you’ll also want to include a column that shows who assigned it.
Next, think of any information that’s unique to your workflow. The goal is to create a quick overview of assignments for you and your coworkers. Some examples are client ID numbers, color codes, contact information, links, etc. Whatever you choose, ensure you’ll use it for most of your tasks so that the column isn’t simply another step—or worse, clutter.
How to Create a Project Management Board in Google Sheets
Google Sheets makes it pretty easy to create a functional project management board. Here are the steps you need to take:
1. Freeze Your Top Row
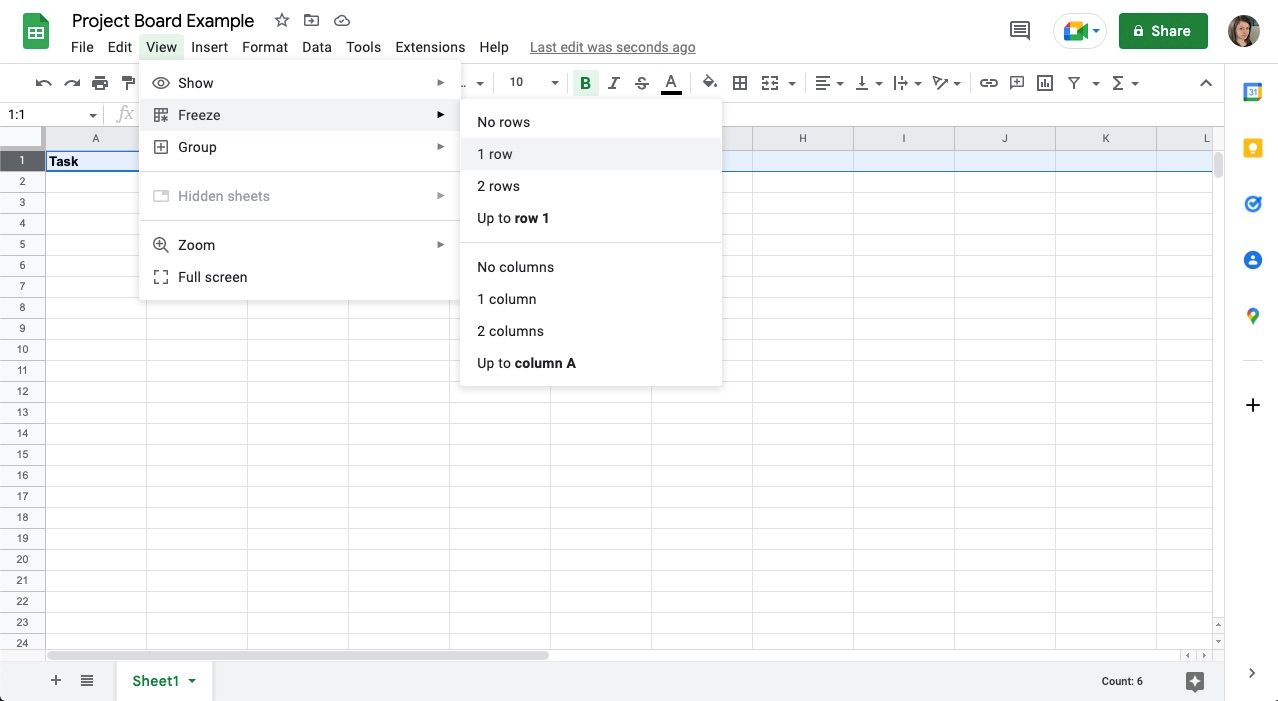
Once you have a list of the columns you’d like to include, type them into your spreadsheet at the top and freeze the row in Google Sheets so that it stays with you as you scroll. To do so:
- Highlight the entire row.
- Go to View in the top-left corner.
- Select Freeze.
- Choose 1 row.
2. Add Formatting to Your Date Column
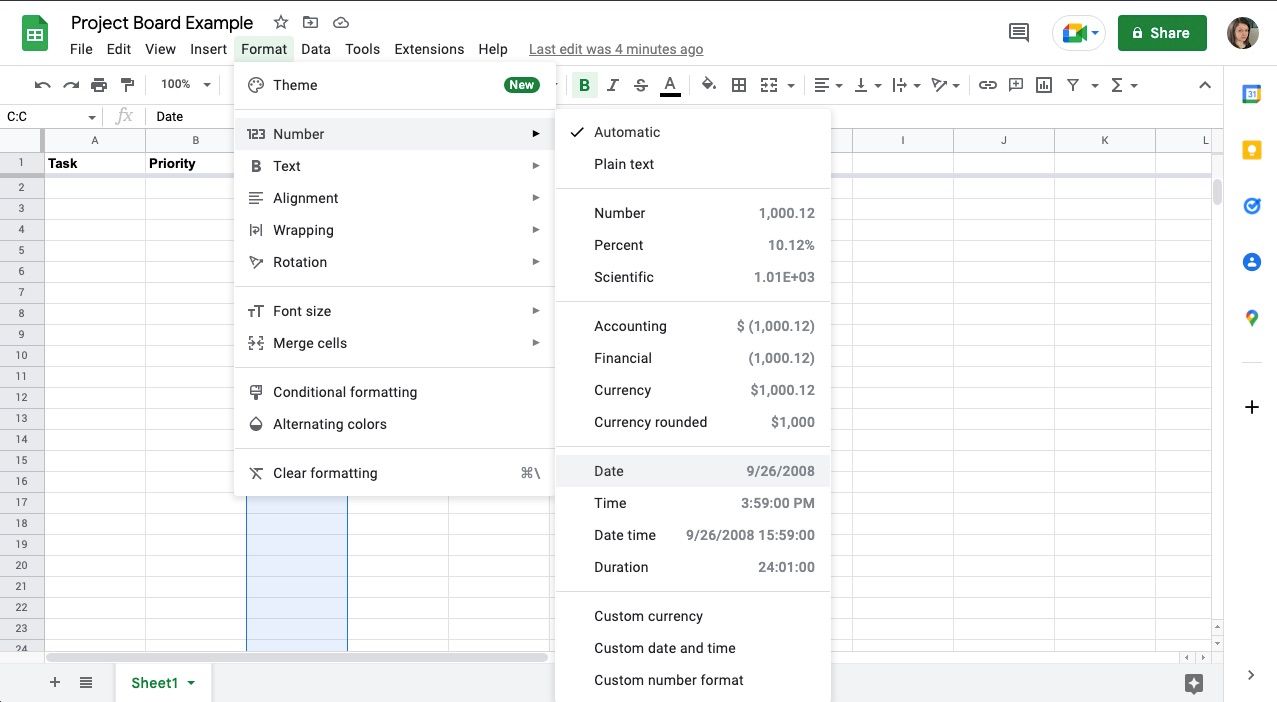
To make adding dates to your board consistent, you can assign formatting to your deadline column. To do so:
- Select the entire column.
- Go to Format in the top menu.
- Select Number.
- Choose Date.
You don’t need to do anything to the task and notes column—just keep them in the text format. For the priority, status, and owner columns, a dropdown will come in handy—you can read about that in the next section.
3. Create a Functional Status Column in Google Sheets
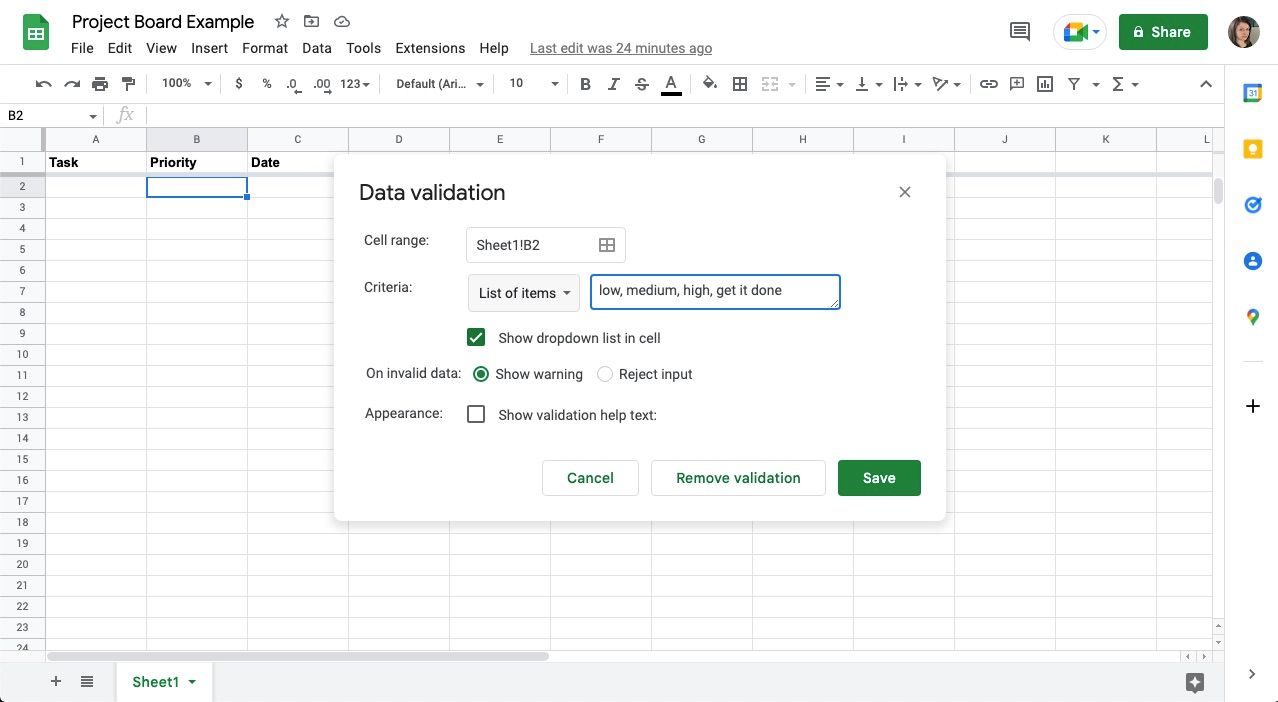
With software like ClickUp and Asana, you can quickly set a task’s status in a couple of clicks. To do so in Google Sheets, you can use Data validation to create a fly menu with multiple words to select. To do so:
- Select the cells below your heading.
- Go to Data at the top of your screen.
- Select Data validation from the menu.
- Beside Criteria, choose List of items.
- To the left, enter the words you’d like to include, separated by a comma.
- Hit Save.
You can repeat the same steps to insert a dropdown menu in other cells below your heading.
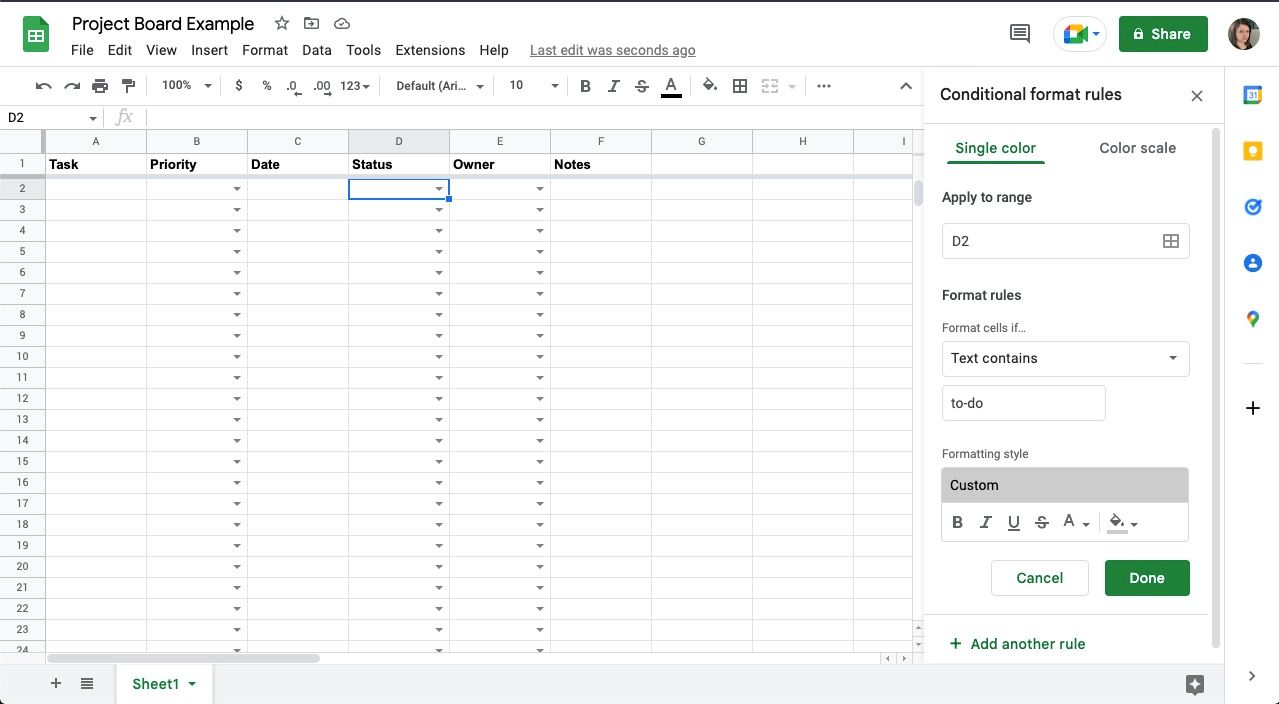
Now, a dropdown menu will appear in the cells. With the cells still selected, you can add conditional formatting to color code your statuses. To do so:
- Go to Format at the top of your screen.
- Select Conditional formatting, and a side menu will appear.
- Double-check that your highlighted cells are selected in the Apply to range box.
- Under Format rules, click the dropdown below Format cells if… and choose Text contains.
- Enter the status in the field that appears underneath.
- Under Formatting style, change the background or text color.
- Hit Done.
- Repeat with the remaining statuses.
Once you’ve added color coding to each option, click through them to ensure they work before you copy and paste the dropdown into the entire column. To paste, select the column using its letter at the top and deselect the title cell by clicking it while holding CMD or CTRL before popping it in.
4. Add Notes to Your Project Board in Google Sheets
Using a project board like this, you can keep everything in one place, including your task notes. This means you can avoid sifting through communications, documents, and the papers on your desk for details. Additionally, you can eliminate the need to email assignment notes to your coworkers.
With that said, you’ll want to keep your notes tidy to prevent them from becoming distracting or counterproductive. Here are some tips to help you format them:
- Double-click into a cell to edit the text within.
- Add a line break using Option + Enter on Mac or Ctrl + Enter on Windows.
- Add a bullet point in front of your text by pressing Option + 8 on Mac or Alt + 0149 on Windows.
- Copy and paste the bullet points if you want to use them again. Google Sheets doesn’t support actual ones.
- Dashes also work as bullet points to make things easier.
- Set your Text wrapping to Clip, so it won’t go outside the cell boundary.
- Clip will also prevent cells from getting too long.
- Double-click a cell with clipped text to view its contents.
Other Things to Note When Making a Project Board in Google Sheets
Here are some other things that can help you manage your project board:
- Tag your coworkers anywhere, including your owner column, using the @ symbol followed by their name or email.
- Use comments to keep communication within your board separate from task information—just add one to the exact cell you have a question about.
- To archive your completed tasks, add a new sheet by clicking the add symbol in the bottom-left corner of your screen, then copy and paste your tasks over.
- Archiving or deleting previous tasks will ensure you have the most important and up-to-date information in front of you—plus, you’ll be able to find things more swiftly.
- If you or your coworker accidentally delete or overwrite something, you can use the version history found in the top-middle of Google Sheets to go back and check it out or revert to a previous save.
Get Your Projects Organized With Google Sheets
Creating a project board in Google Sheets is a simple, budget-friendly solution for those looking to keep tabs on tasks or collaborate with a team. With some initial planning and a little work, you can build one that allows you to add information in just a few clicks.
An additional benefit is that beyond building the template, there’s less of a learning curve for you and your coworkers to maintain it if you’ve already used spreadsheet software. Plus, you can add as many or as few features as you’d like.
